
Over the weekend I finished painting the bridge of the USS Cousteau, (this is the ship that the player characters serve on in our Star Trek Adventures RPG).
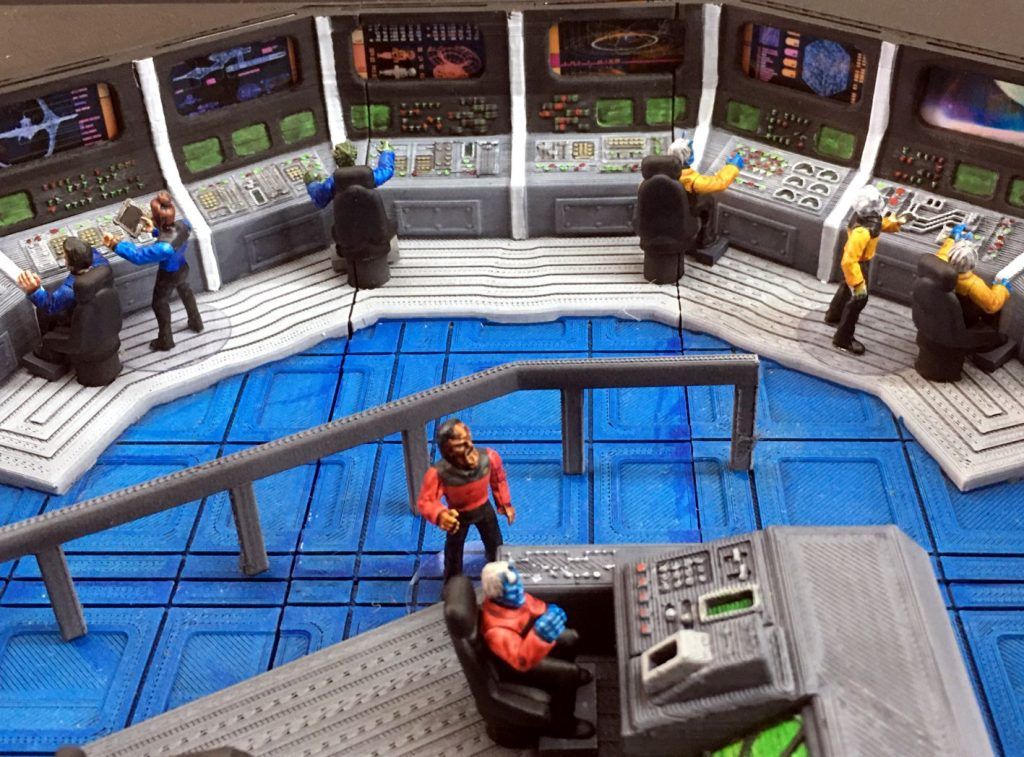
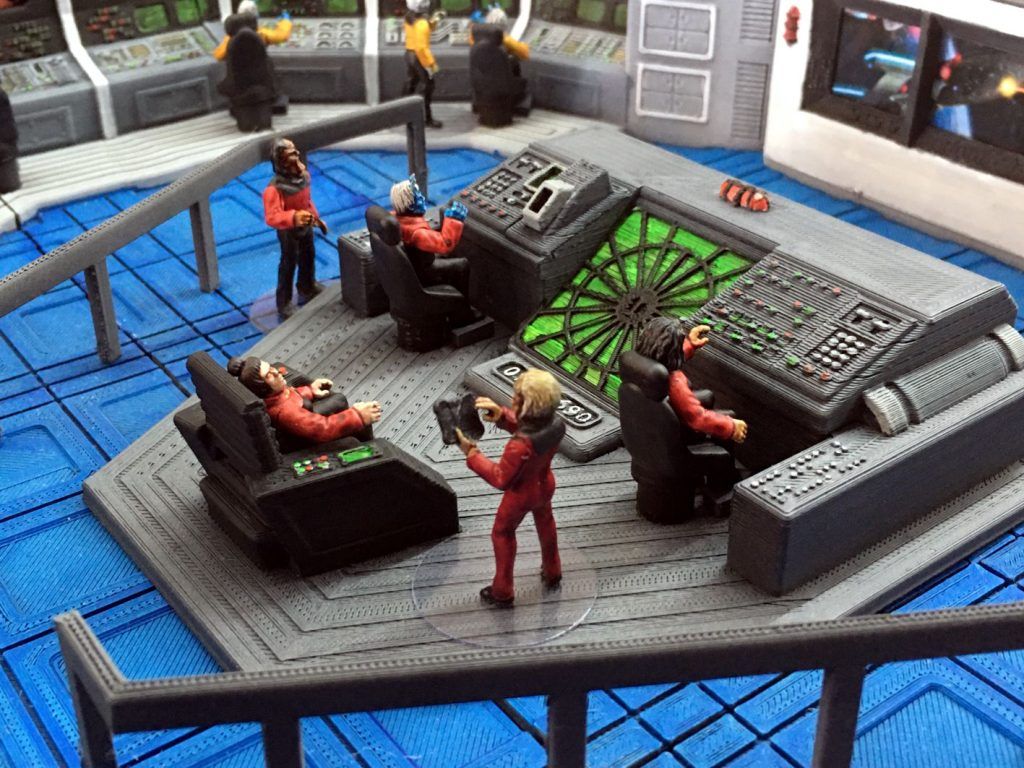
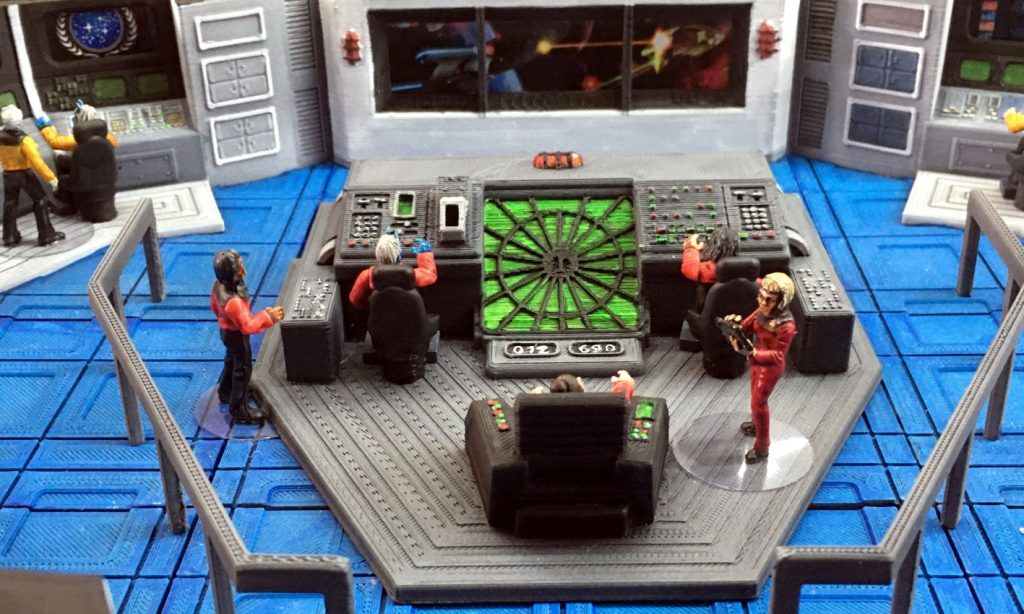
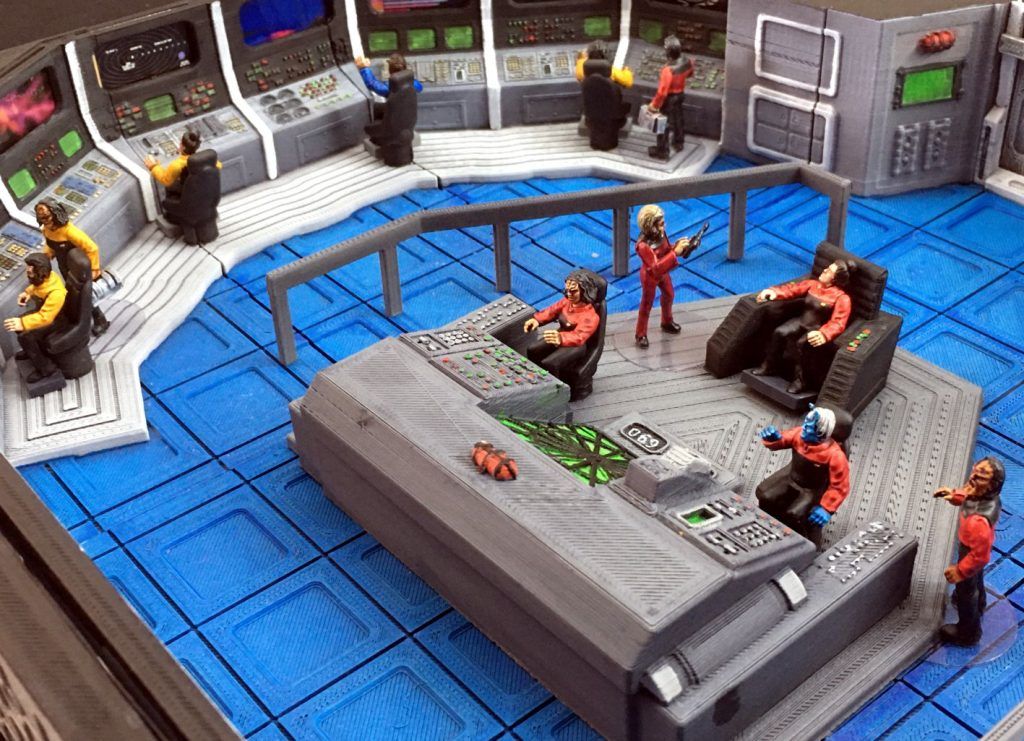
It seems to have taken a long time to get to the painted and crewed stage. I was lucky to be one of the first customers to be able to buy the files from LV-427 to 3D print the large star ship bridge. I printed the model out as soon as I had the files. The bridge model consists of nine pieces that form the floor and walls of the bridge, plus the central command / conning area, rails and chairs.
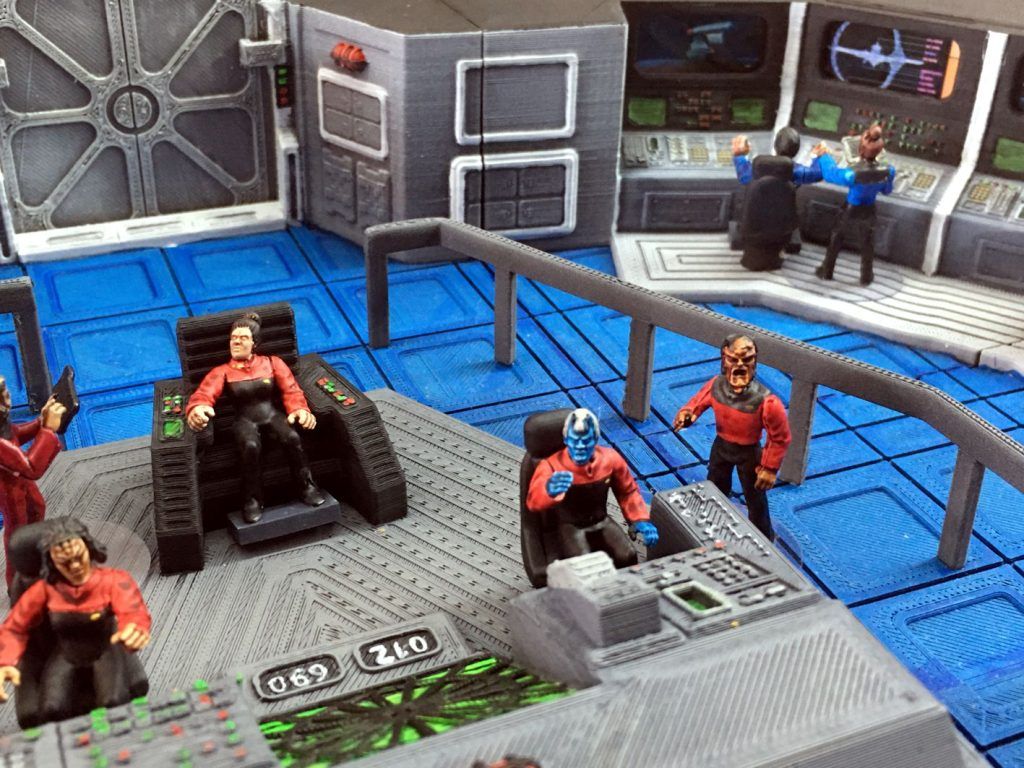
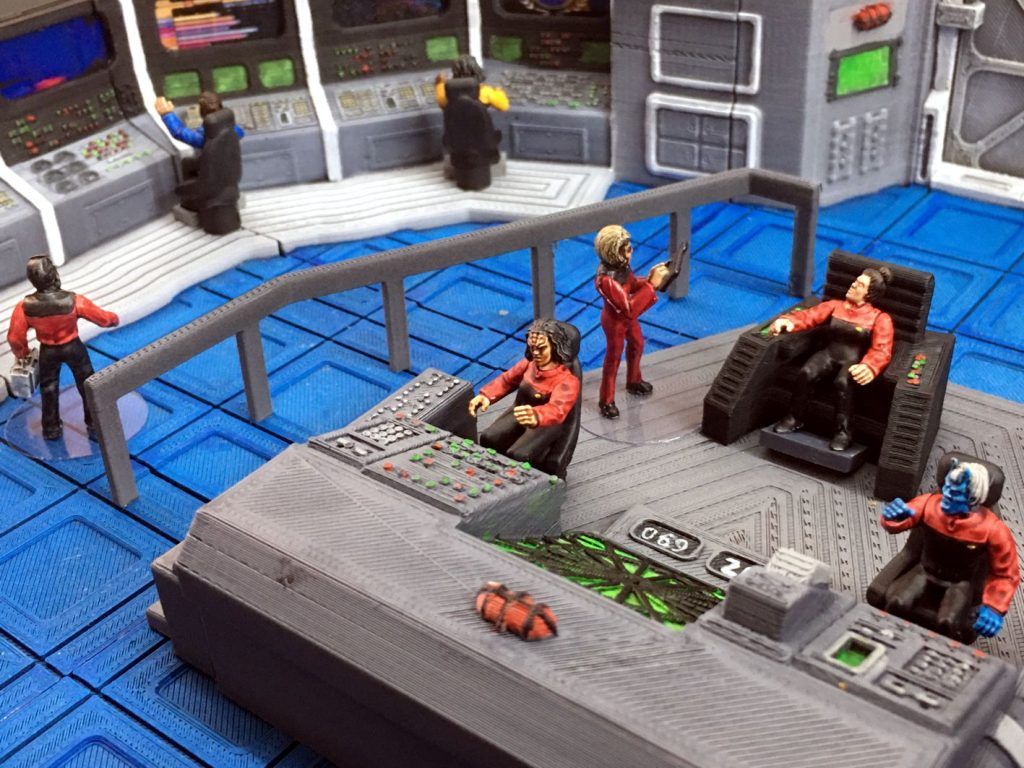
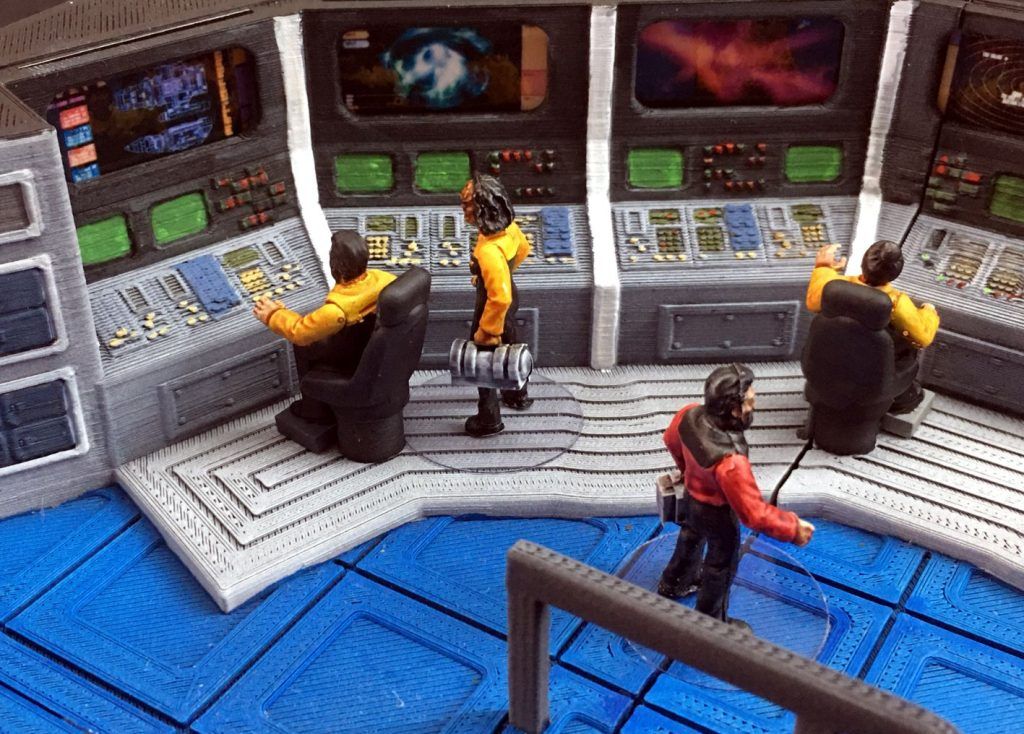
One of the reasons that it has taken time to complete is that I was working on the bridge crew at the same time. The miniatures are from one of our ranges, Landing Party 28mm Sc-Fi. I wanted to have seated figures to place in the chairs to look like they were operating the various stations. This meant that I needed to send one of the terrain pieces, to our very talented sculptor, Jaycee Fairclough to sculpt some seated crew figures. She discovered that the seats that came with the model were a little large compared to our miniatures. Consequently, Jaycee has also sculpted a new chair that fits on to the chair pegs on the bridge (and other models in the LV-427 range).
The chair can also be used stand alone in other models.
Mark Stevans from LV-427 has done a fantastic job designing this model. It is obviously not a licensed model of the bridge of a Galaxy or Constitution Class Cruiser, however it is certainly inspired by Star Trek and had its own charm and character.
The model has been primed and undercoated using Halfords Auto paint. The pieces were painted individually and glued together right at the end. Each pieces was sprayed matt black all over from top and from the bottom. The bridge was then set up roughly on a board outside and was sprayed at a 45 degree angle, from a couple of feet away with Halfords Grey Primer, to bring the tone down to grey while leaving a darker tone in recesses. Finally a light wafting of white was sprayed from a bit further away to highlight the model.
The main areas of the ship were painted using Army Painter Speed Paints. I found that these worked particularly well for painting large areas of terrain. The paint flows like a stain, covers well and is easy to apply to 3D printed models.

The floor was painted first using Army Painter Speed Paint Magic Blue.
The lower, ‘desk’ half of consoles were painted Speed Paint Runic Grey and the upper part Speed Paint Grim Black.
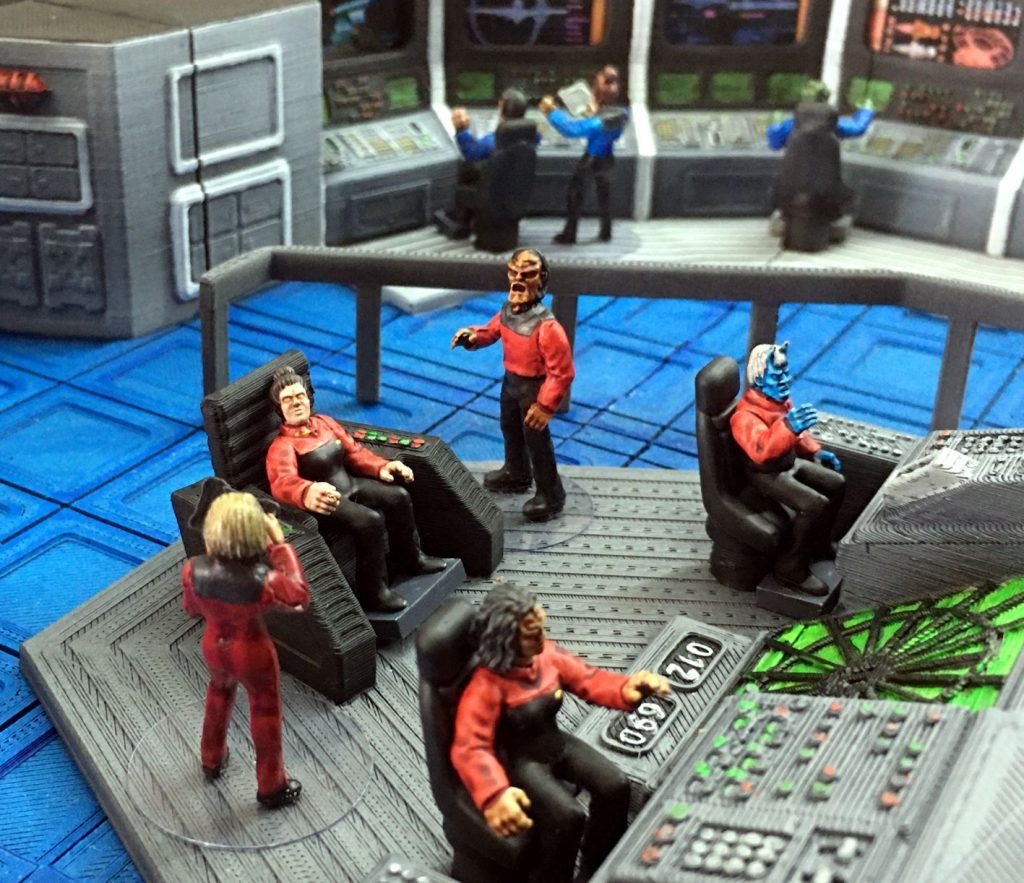
Chairs were also painted Grim Black. Some of the upright cabinets were painted Gravelord Grey.
When the speed painted areas had completely dried, I gave the whole model a light spray of Matt Varnish to seal the speed paints before picking out details with normal acrylic paints. The strips of wall between consoles, around main view screen and doorway were painted matt white and knobs, buttons, lights were picked out red, green, black & sand.
The bridge model comes with slots that images can be dropped into to populate computer displays. I flicked through my Star Trek RPG source books and found some images of view screens that I liked and photographed them, edited them to size, printed them out and laminated them before cutting up and dropping into position.
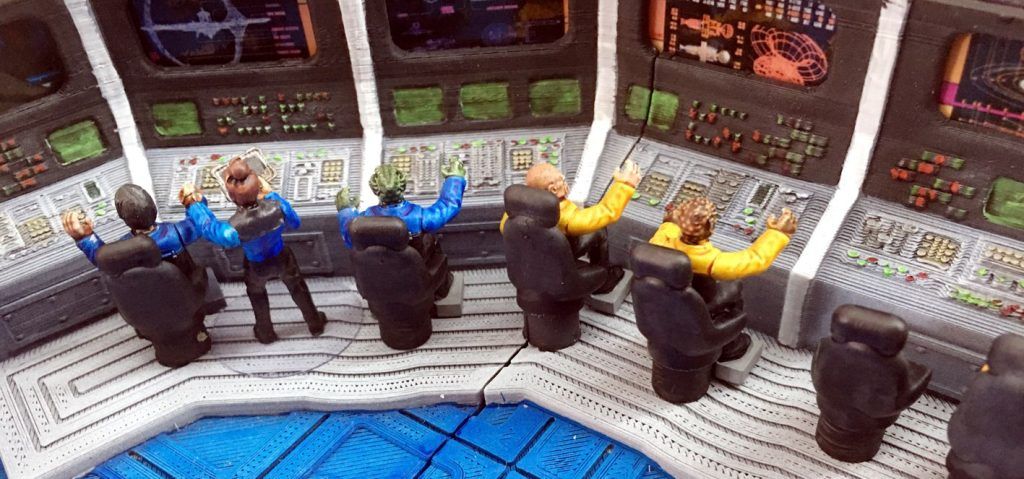
The top image show some of our new swivel-chairs in use to double up the number of bridge staff working the stations. Every other seat is a free standing seat from Landing Party range.
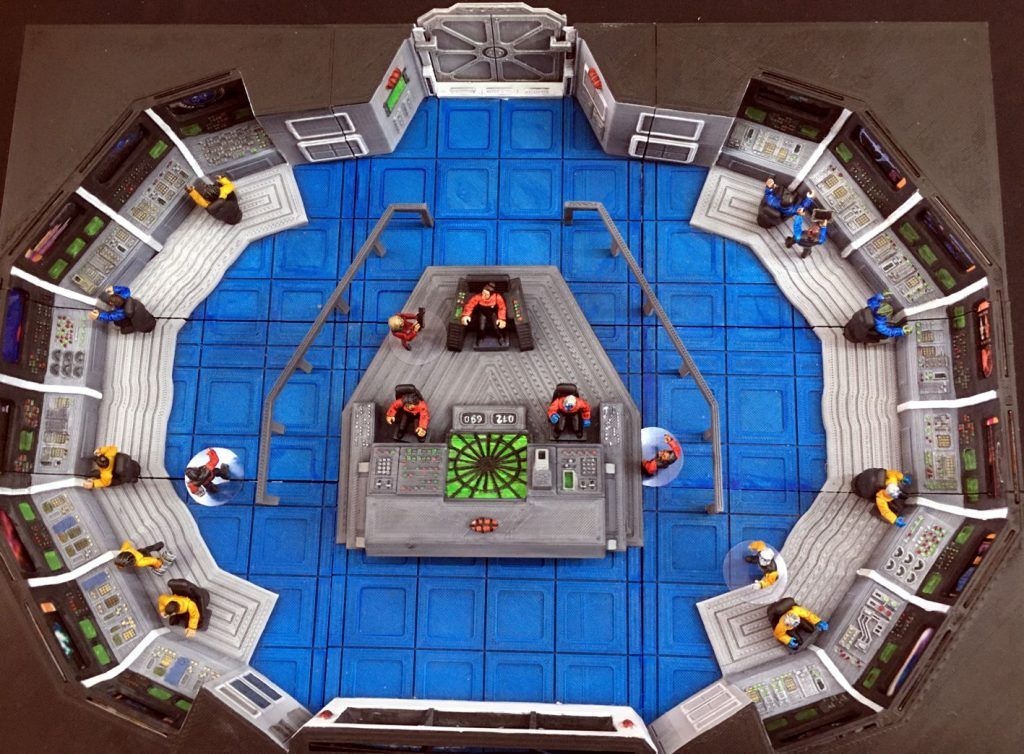
Here’s a top down view of the bridge. I decided to paint the cut away sections matt black, so this is an approach that I will have to adapt across the rest of the ship. Now that I have the bridge completed, the next thing that I am planning is to add a section of ‘T’ junction corridor behind the door connected to a Turbo-Lift to one side and the Captains Ready Room to the other.
All of the ships crew miniatures are from the Sally 4th Landing Party range, click here to take a look.
The ships bridge is a 3D printable design from LV-427, click here to take a look at there Star Trek inspired terrain. I printed mine on an Ender 5 Pro 3D printer at 0.2mm layer height using eSun PLA+.
0 Comments