

Last week I was lucky enough to be sent a preview / demo set of the new Epic Punic Wars miniatures from Warlord Games.
Even although I already have armies for Punic Wars using 28mm metal miniatures from Wargames Foundry, I am very excited by the possibilities offered by this new release. Over the last couple of days I have painted up a four base unit of Roman Infantry. It has taken me about three hours from start to finish using Army Painter SpeedPaints. Each base has 30 miniatures, so that is 120 miniatures for the unit. For me, that looks far better on the table than the 16 x 28mm miniatures I was using before. In this painting guide, I am going to show you step by step how I painted the unit using the illustration from Osprey’s Armies of the Carthaginian Wars as a reference.

I started, in the way that I approach painting miniatures in all scales, these days. The figures were primed using Halfords Auto Primer, Matt White. I used a small piece of masking tape to tape the three strips of figures that make a unit as a block. I did this because I did not want to get any paint where the strips touch when placed together as, when painted, I want to glue the strips together with plastic cement which works better on plastic that is not covered in paint.
When the primer had dried, I used a large brush (No 6) to paint a brown ink wash over the miniatures. I left this to dry thoroughly overnight. In the morning, I drybrushed the miniatures with Army Painter Matt White Acrylic using a make up brush. This creates a good shadow and highlight which aids the tonal range from speed paint and also makes it easier to see the details of what’s being painted.

I always like to start by painting any visible skin. Faces, arms & legs were picked out using Crusader Skin.
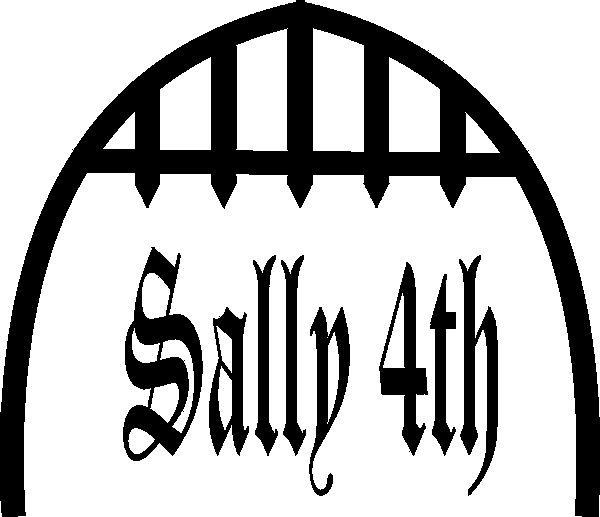
Next up were metals, starting with armour and weapons, for which I used Enchanted Steel. All painting was done using a cheap & cheerful Army Painter Hobby Basecoating brush. The main change that I found helped painting strips of small figures compared to 28mm miniatures was to hold the base in one position and then apply the same stroke to all miniatures, then change position of base and apply a subsequent stroke in same place on all the miniatures. For example, I did not paint all of the chainmail on one miniature before moving on to the next. It was a lot more effective to load brush with plenty of paint and then do a stroke that went left to right under belt on all figures then changing angle and painting a stroke doing right to left under belt on all figures. On a 28mm miniature I would have just painted everything that needed to be painted Enchanted Steel before putting down and picking up the next miniature.

Hoplite Gold was used to paint the helmets.

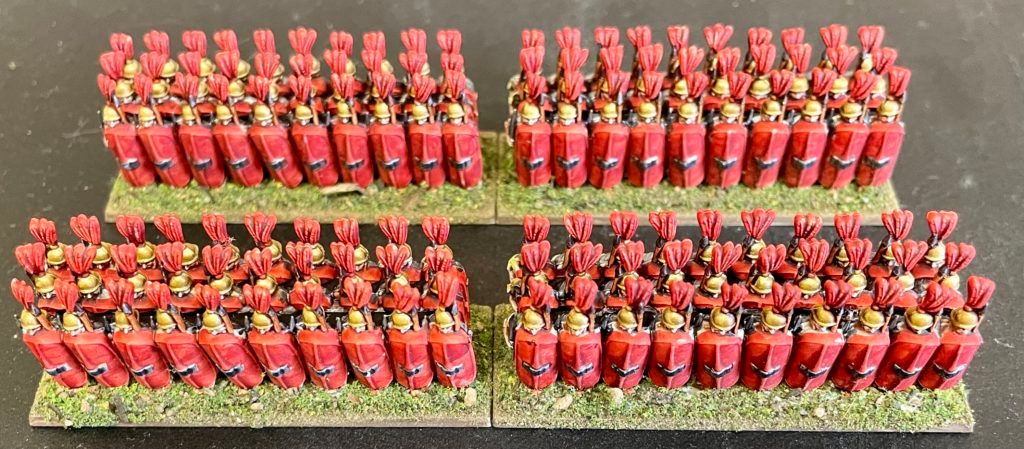
I have seen a number of people paint the boss and spine on shield Gold, which looks really good, however I had decided to follow the Osprey Illustration so painted the whole of the shield (apart from steel boss) and the helmet plumes using Army Painter Bright Red.

In this scale, you only really need to use one brown. I choose Hardened Leather and used this to paint sandals, belts, scabbards and pilum handles.
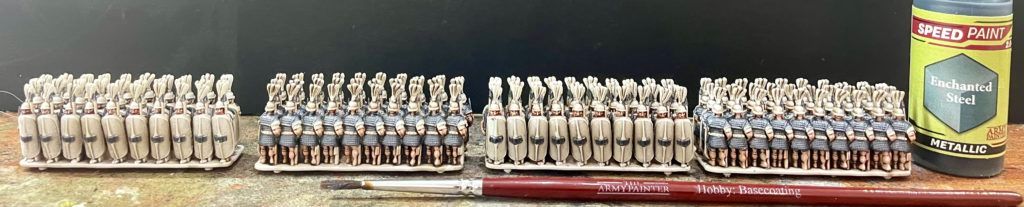
Tunic sleeves could have been left white, but I decided to use Malignant Green. This gives a nice subtle shade, like linen dyed with nettles that has faded in the sun!
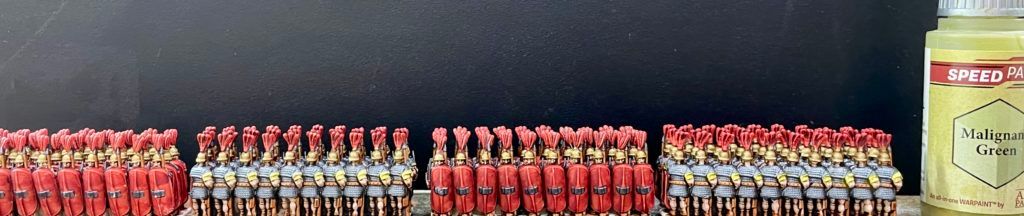
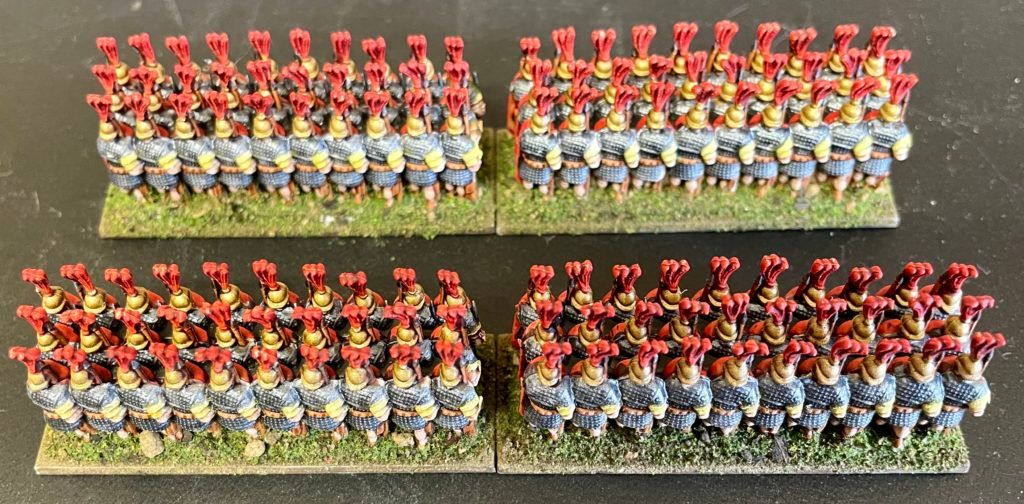
These are the completed miniatures, prior to gluing together into blocks. I love the way that Warlord has designed these with front detail on front rank, backs on the rear rank and just heads for the middle. It makes painting very quick and efficient as you are not painting anything that will not be seen! I did use a little black paint to go around any pieces of the block that joins the ranks together.
Bases from the front. Once glued on to bases, which I had already painted using Sandtex Bitter Chocolate (which I use for painting all bases, buildings & terrain), I applied some PVA glue with a No 6 brush and dipped bases into pot of basing mix which contains earth (sterilised from garden) and Woodland Scenic mixed turf.
Handy Links:
Epic Punic Wars – The Adventure Begins! Project kick off article
Epic Punic Wars – Week One Painting article
Epic Punic Wars – Check out the full range at pre-launch discounts
Really nice and great to see in practice the way that unseen aspects of the figure strip are not painted. Thanks.