
Infamy, Infamy is a ‘super skirmish’ set of Ancients rules, published by Too Fat Lardies, that cover the wars between Rome and her barbarian enemies between 60BC to AD100. Figures are mounted individually but fight as part of units that are deployed on movement trays holding various numbers of figures depending on there type. Roman Legionaries come in units of eight. I stumbled across this set of rules completely by accident, while looking for videos to teach me how to play ‘O Group’ Battalion Level World War Two rules. I’ve been gaming for about 40 years, but have never painted, collected or gamed with the classic Early Roman Empire Legionaries. I watched a couple of You Tube videos and was captivated, ordered a copy of the rulebook and got to work!
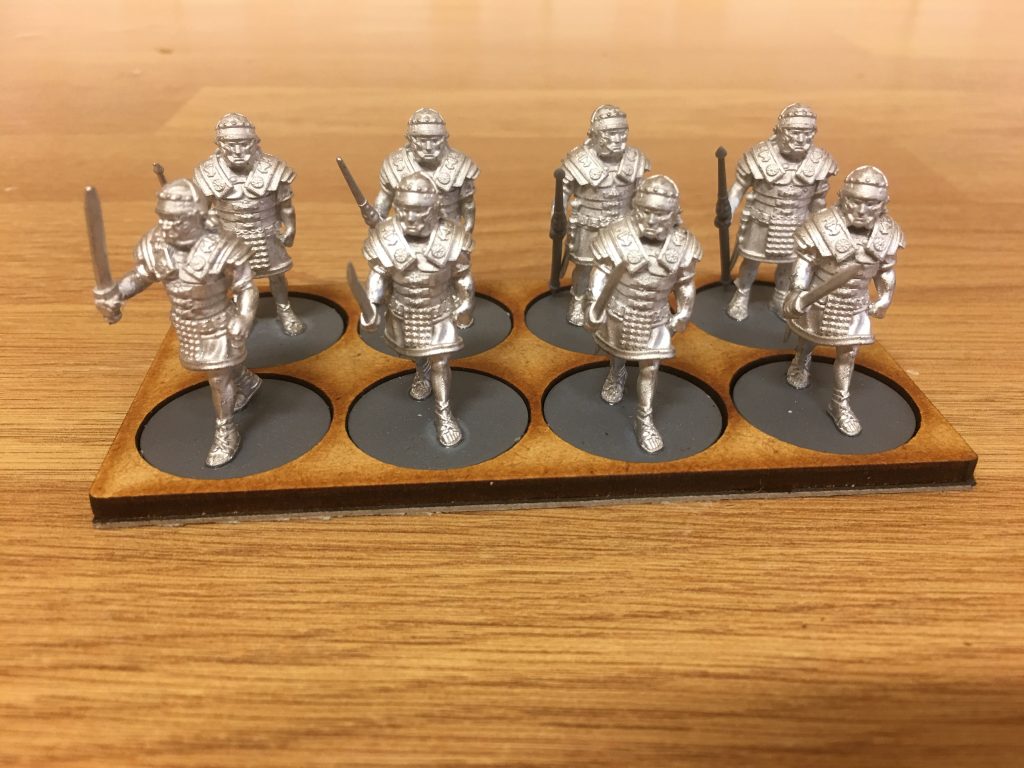
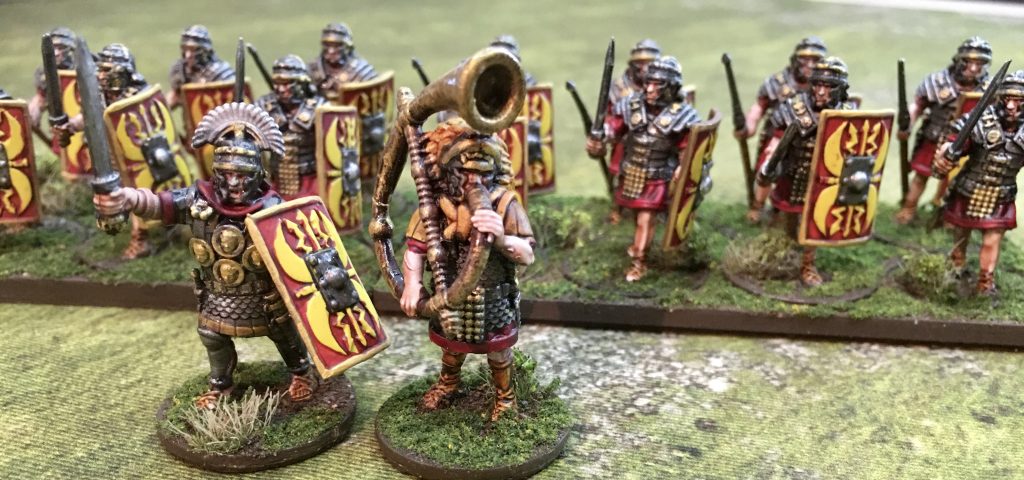
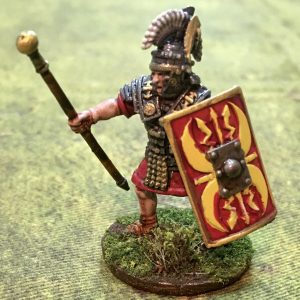
This Blog is going to cover collecting, painting, making scenery and gaming Infamy, Infamy. I am starting right at the beginning. I’ve not played yet and need to collect and paint the armies from scratch. I am starting by collecting the Romans. Pictured above is my first unit of Legionaries, the core troop type of Roman armies. The miniatures are from Sally 4th’s Might of Rome range, designed by Iain Lovecraft. The Legionaries come equipped with both a sword and a pilum. For my first few units I have used the Standing Legionary for the rear rank, and equipped them with a pilum and the Advancing Legionary for the front rank and equipped them with a sword. Prior to priming I glued them onto Renedra 25mm round bases. The miniatures are not cast on a plinth or a tab, so no cutting or filing is required to mount them flush to the bases with no unsightly mounds.
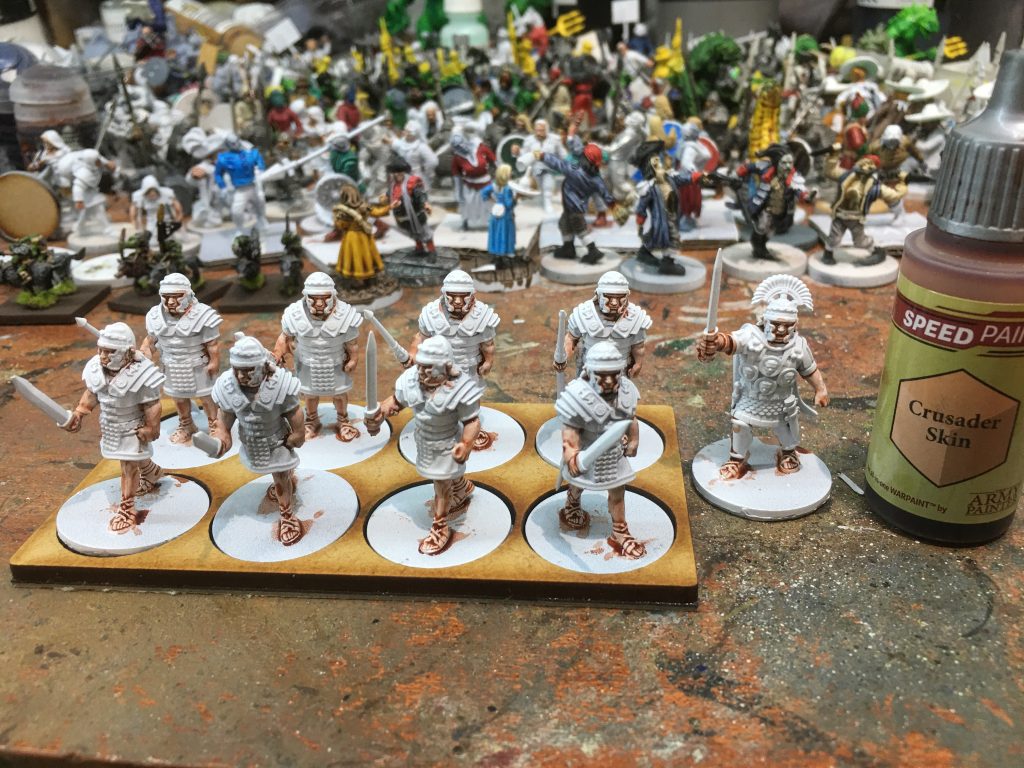
I started off painting flesh (face, arms, legs and little triangle between armour and helmet at the back. I used Army Painter Speed Paint Crusader Skin. This is my favourite skin paint as it shades and highlights all in one. In this photograph a single coat has been painted. No extra ink washes or drybrushed highlights!
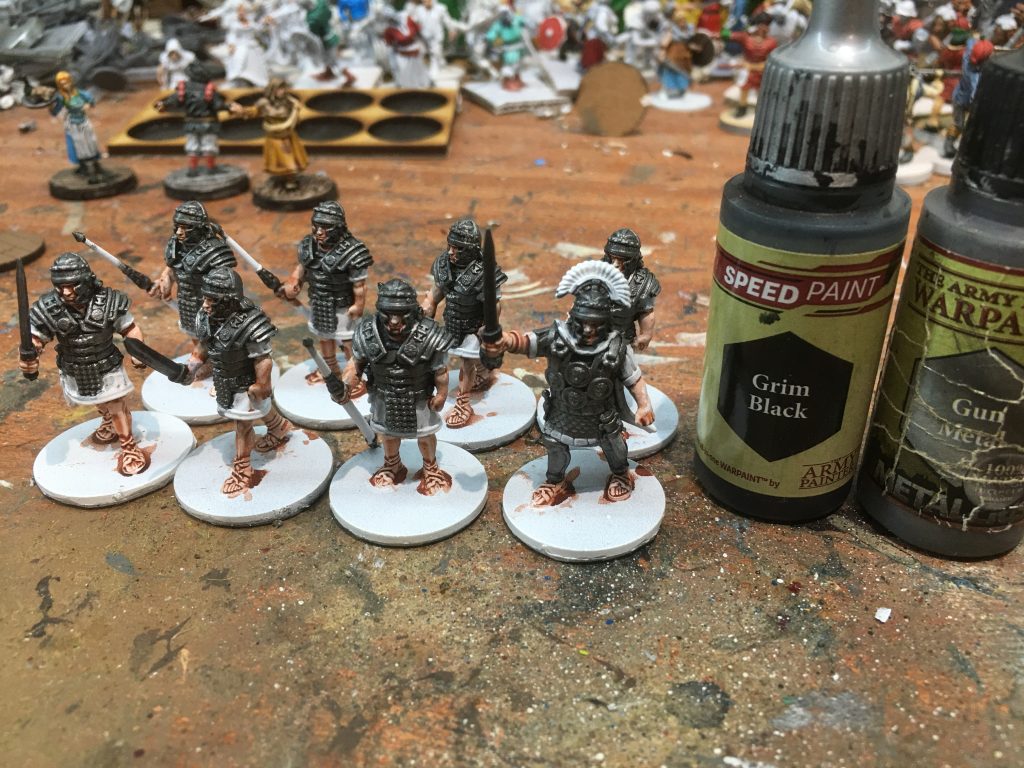
The second thing to be painted was the arms and armour. This was painted with Speedpaint Grim Black. When it was completely dry I then drybrushed with Army Painter Gunmetal, followed by a light highlight of Shining Silver.
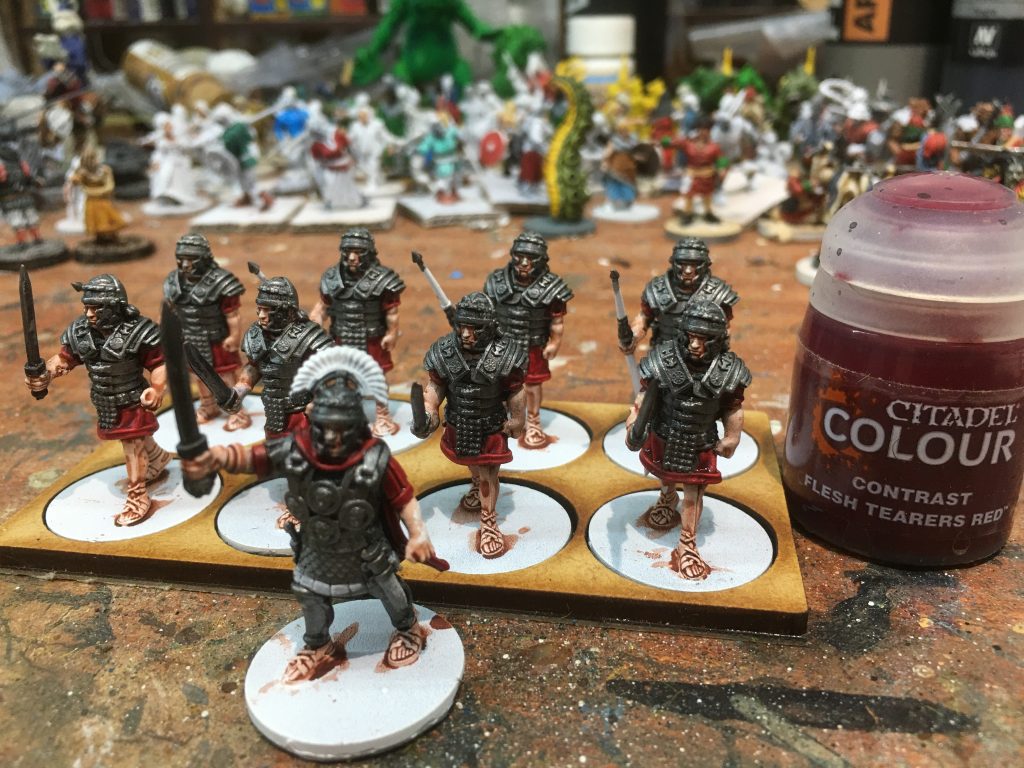
Sleeves, Tunic and the Centurions cloak were painted using Games Workshop Contrast Paint: Flesh Tearers Red.
The other colours that I used were Speedpaint Hardened Leather to paint the wooden parts of the pilum and sandals, and Army Painter Bright Gold to pick out detail on helmet and armour
I found that the easiest way to paint the shields, that come with the models and have nice embossed detail, was to spray them yellow, and when dry paint the red parts using the GW Contrast paint Flesh Tearers Red that I had used to paint the tunics.
Bases and movement tray were painted with Bitter Chocolate Sandtex emulsion, before sterilised soil from the garden and woodland scenic turf was applied. Miniatures received a brush on coat of gloss varnish to protect them prior to being sprayed with Army Painter Matt Varnish. When this was completely dried, gloss varnish was reapplied to metal parts to make them shine!
My force to date consists of 2 units of 8 Legionaries @ 21 pts = 42pts plus the Centurion
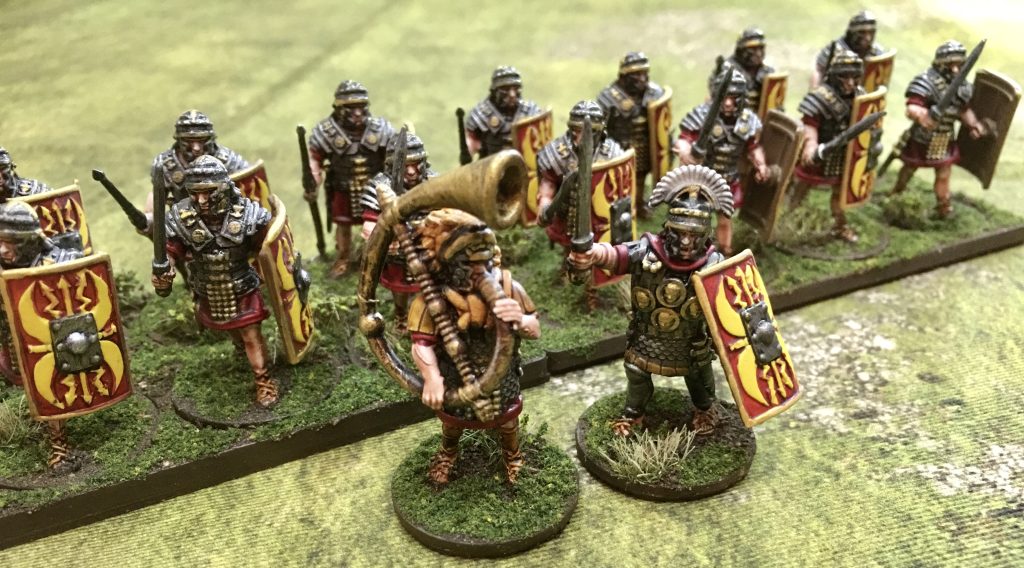
My next activity is to paint an additional unit of 8 Legionaries plus an Optio.
Update 6th December 2022
This week I have painted a third unit of eight Legionaries plus an Optio
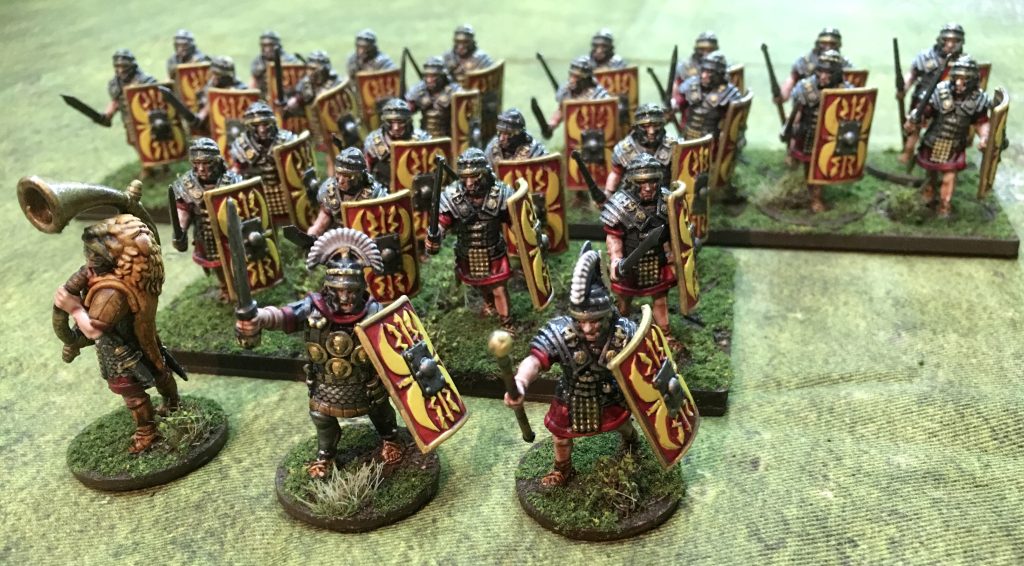
This brings my force to 27 (24 legionaries plus Centurion, Optio and musician)
I have been making the movement trays for the units as I go along, so they are not a big job to do at the end.
I’m planning to add a couple more units of Legionaries to my force, maybe with front rank throwing Pilum and 2nd rank standing with Pilum. Sally 4th have some Early Imperial Roman Cavalry in the pipeline, so a couple of units of those will be joining my force as soon as they are available.
Early Imperial Miniatures are are all from Sally 4th’s Might of Rome range, click here to take a look.
Update 11th January
Last week I started working on some opposition. I have chosen Gaul to be my Romans first opponent as Victrix have some great looking Infantry and Cavalry. I started with a set of Gallic Infantry. I assembled all 48 and am painting them in batches of 12.
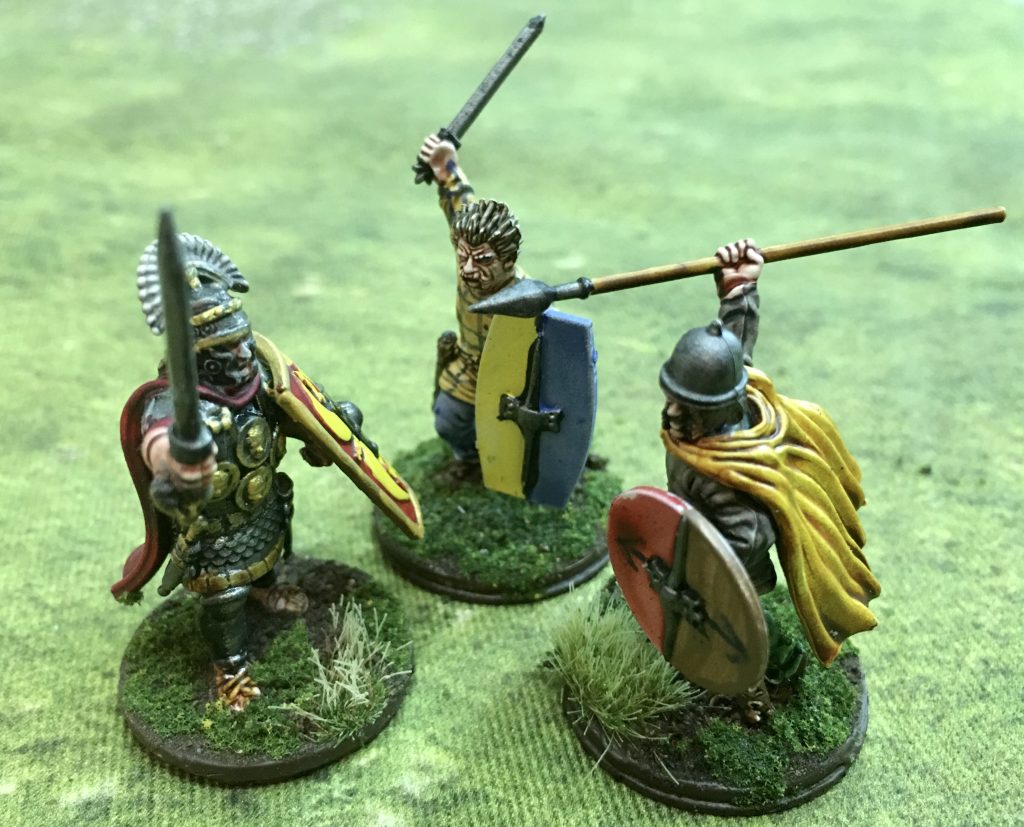
I have painted the Gauls using Army Painter Speed Paint and Games Workshop Contrast Paint. These are definately my ‘go to’ paint set at the moment. I have also been experimenting with Gel Pens and Watercolor Pens for doing the checks on the Gauls clothing.
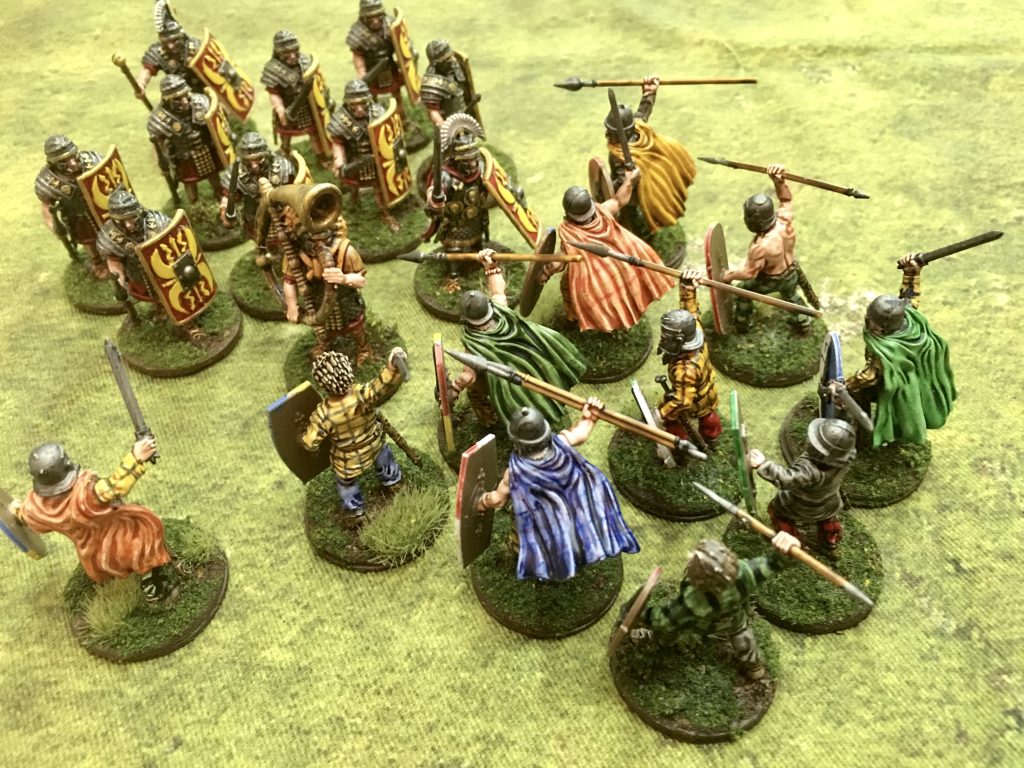
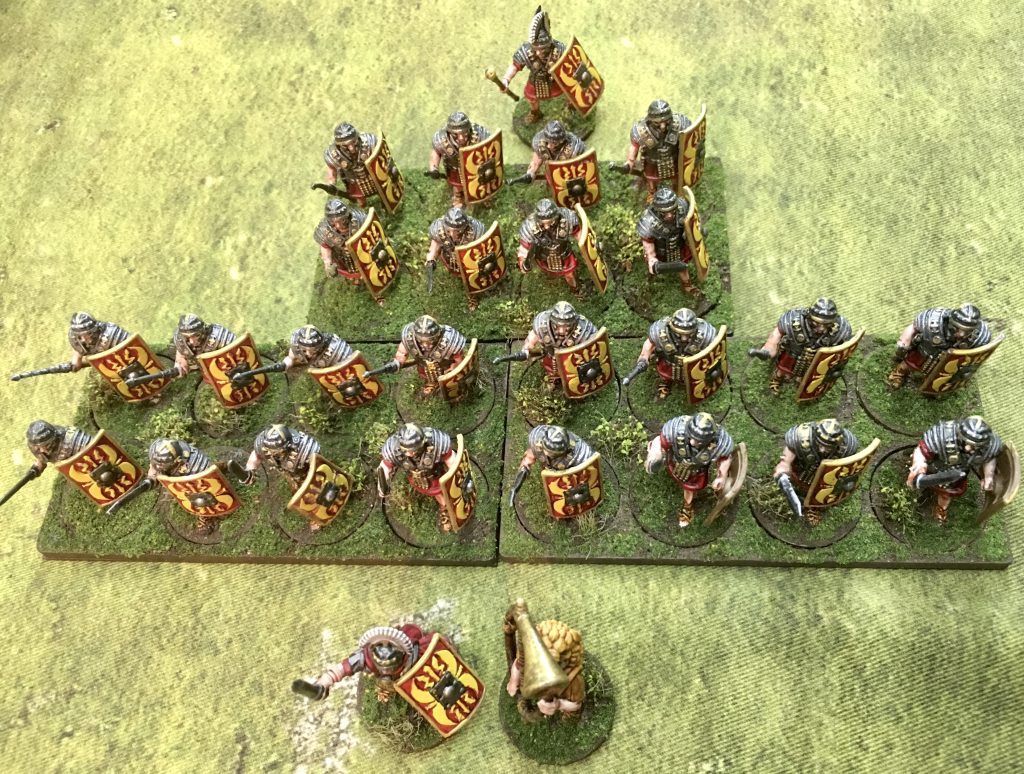
I was relieved to find that the Sally 4th Early Imperial Romans match up perfectly, scale wise with Victrix miniatures. I thought that they would, as we are always very careful testing scale before we commit to casting in metal, but this was the first time we had seen them toe to toe with some Victrix Miniatures.
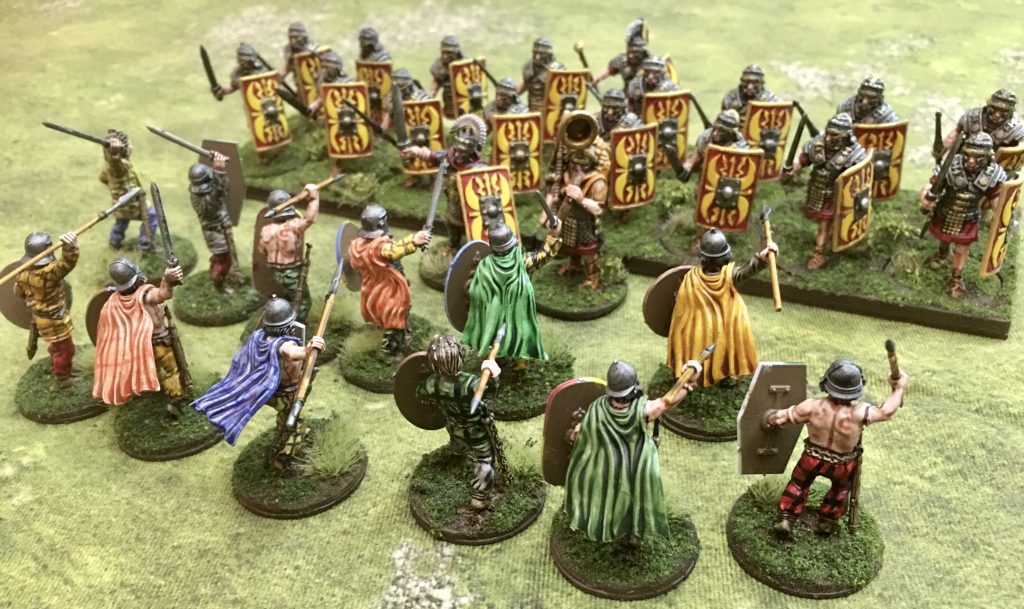
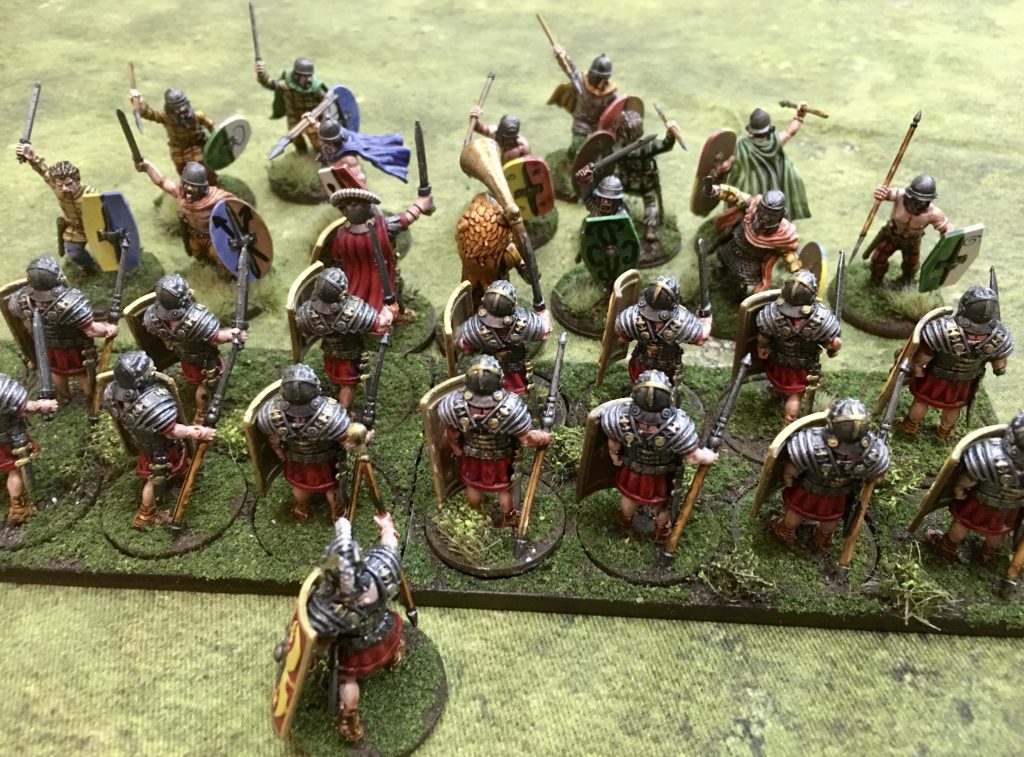
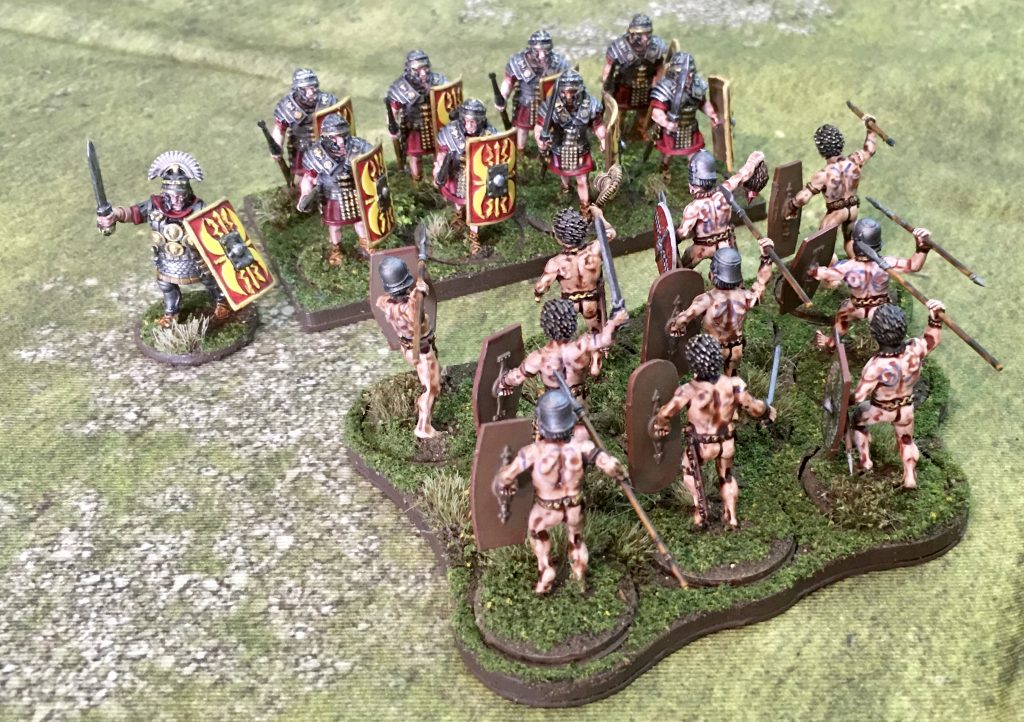
The skirmish from the Gallic and Roman rear ranks!!
My next activity for building forces for Infamy, Infamy is to design and cut some suitable movement trays for the Gauls, and get a second batch of 12 painted. I have my eye on the set of 12 Gallic Cavalry, but I have promised myself not to buy any more miniatures for the project until I’ve painted the remaining 36 Gauls that are assembled and primed.
Update 9th March 2023
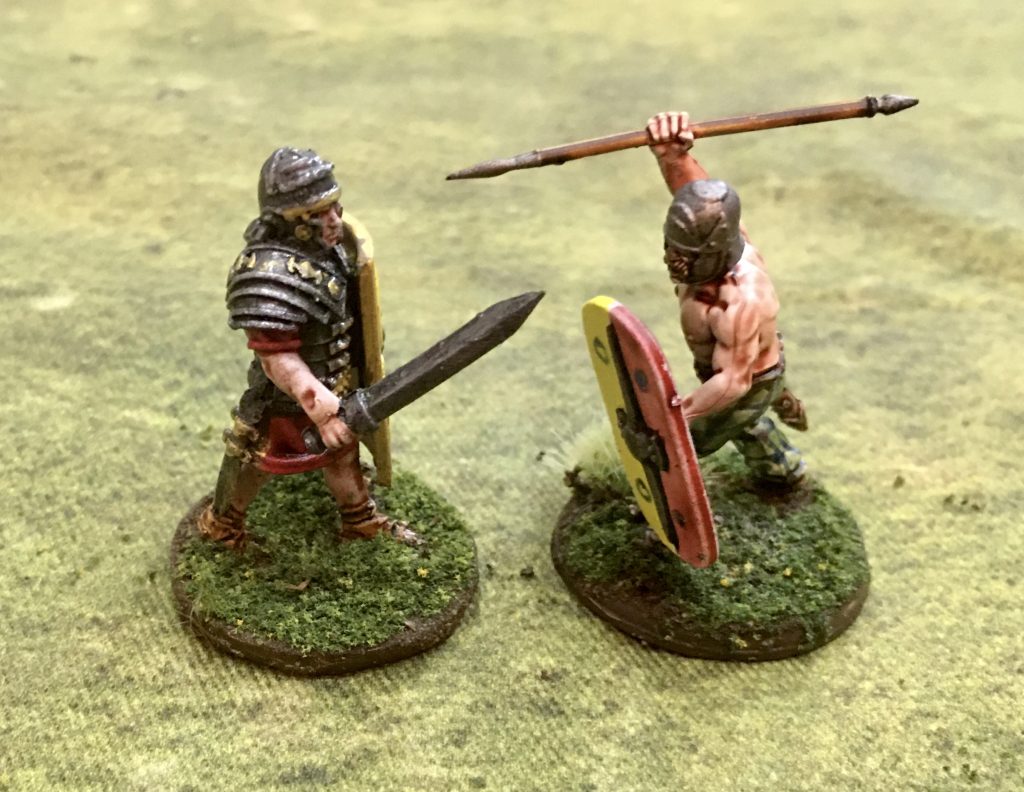
What is it with wargamers and promises? I gave in… I’ve not painted all 48 of my Victrix Gauls and I was tempted to buy a pack of 24 Naked Gaul Fanatics. My reasoning being (as if any was needed) that these guys are naked apart from a helmet (in some cases) and a belt, so a quick all over Contrast paint flesh and a dab of woad and they would be done.
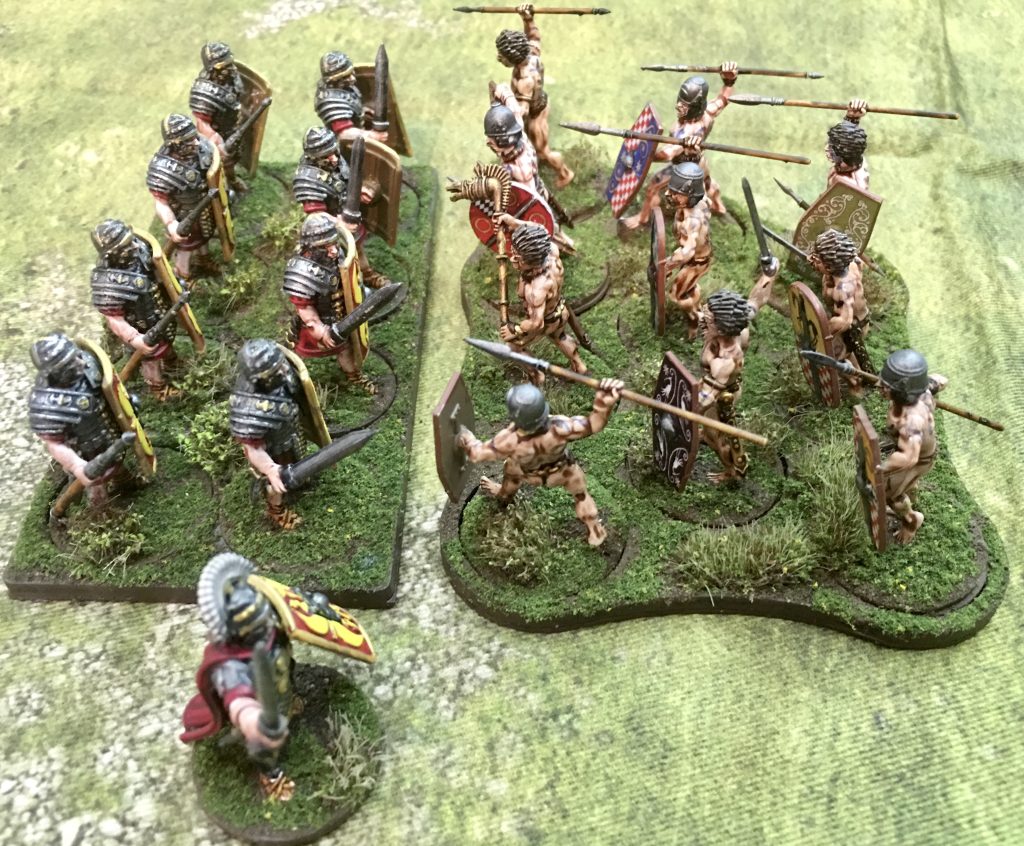
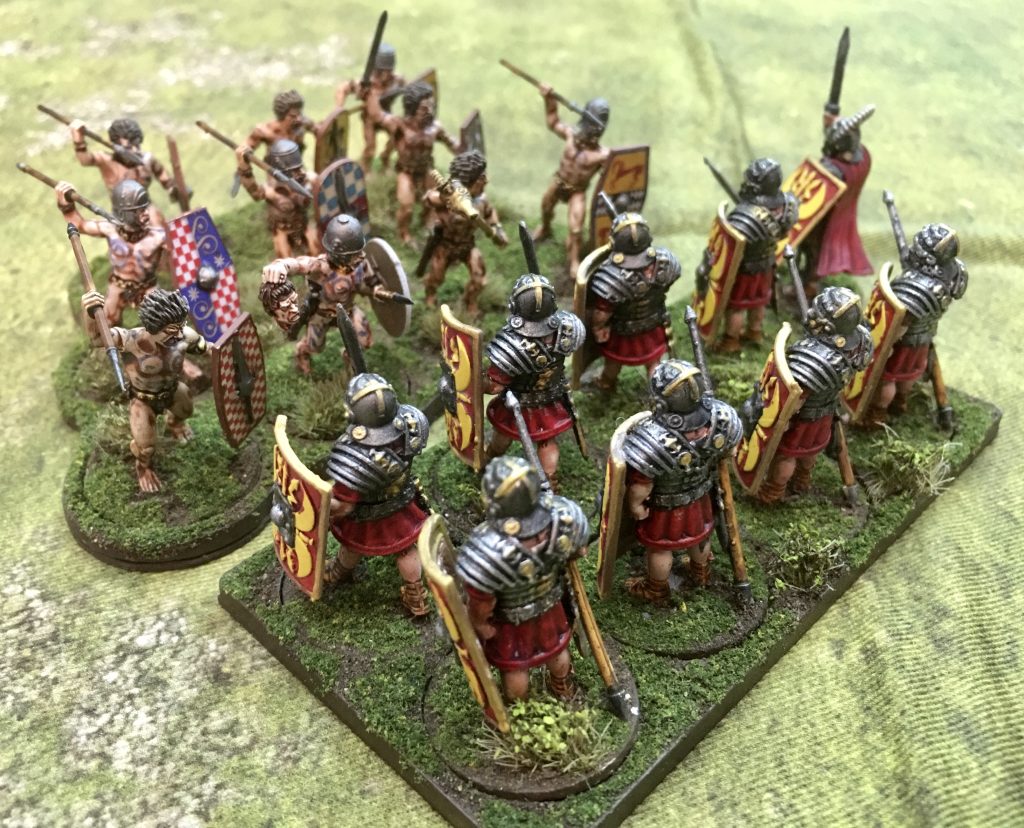
The miniatures were very quick and easy to paint. I did try out four different contrast flesh tones, three from Games Workshop and Army Painter Crusader Flesh, and found that the three Games Workshop Flesh colours were pretty much all the same and the Army Painter tone was significantly paler (as if they’d only just decided to strip off and did not have an all over tan yet!).
I used the Battle Flag Gaul transfer sheet for the shields. They were a bit fiddly as lots of the shields have a metal strip dividing the shield and the transfer in to two, but with a bit of patience they went on nicely and add a good focus to the miniatures. Woad was applied with a fine blue sharpie pen!
I have also made some 10 figure irregular warband movement trays which work very well. I have used steel vinyl on the movement tray and magnetic vinyl on the bottom of 25mm Renedra plastic bases. I managed to pick up a 1″ round cutter from Amazon, which makes it very easy to cut magnetic vinyl disks to stick underneath bases.
The Early Imperial Romans that they are facing are from Sally 4th Might of Rome range, designed by Iain Lovecraft.
0 Comments